
Soft pumpkin oat bars
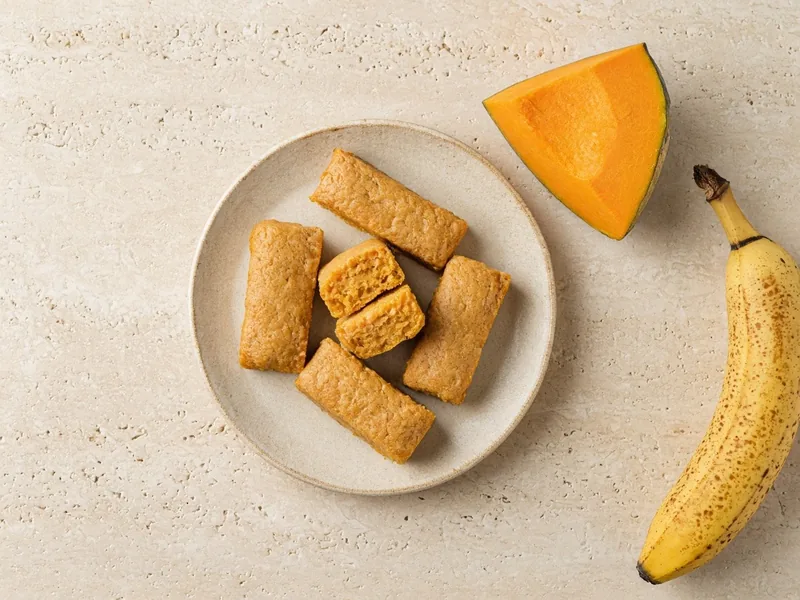
Soft baked fingers of pumpkin, ripe banana and blended oats, with no sugar or salt. They're firmer than porridge, so check that they squash flat before serving. If oats are new, offer them on their own first.
- From
- 6 months
- Time
- 45 min
- Makes
- About 12 fingers
No top allergens
Ingredients
- 250 g (1 cup)mashed cooked pumpkinfrom about 400 g (14 oz) of raw pumpkin, or canned 100% pumpkin purée; not pumpkin pie filling, which has added sugar and spices
- 1ripe bananayellow with brown speckles
- 1 cup (about 100 g)plain rolled or quick oatsno added sugar or salt
- 2–4 tbspbreast milk, formula or wateronly if the mixture is too thick
- 1 tspvegetable oilfor the tin
Steps
- 1Wash your hands. Scrub the pumpkin under running water, cut it in half and scoop out all the seeds and stringy bits, then peel it and cut it into chunks. Rinse the banana, even though you'll peel it.
- 2Steam the pumpkin for about 10 to 15 minutes, until a knife slides through with no resistance. Drain it well and mash it until smooth. Skip this step if you use canned purée.
- 3Heat the oven to 180°C (350°F) and oil a small baking tin, about 20 cm (8 in) square. Blend the oats until they look like fine flour, so there are no dry flakes left.
- 4Mash the banana into the pumpkin, then stir in the blended oats to make a soft, thick mixture, adding a little liquid only if it's too stiff to spread. Don't add sugar, honey, syrup or salt.
- 5Spread the mixture into the tin about 2 cm (¾ in) thick and smooth the top. Bake for 20 to 25 minutes, until just set and only lightly golden at the edges. It should stay soft and moist, like a thick pancake, not dry or crisp: dry, crumbly bars are like the granola bars and cookies the CDC lists as choking hazards.
- 6Let it cool in the tin for 10 minutes, then cut it into fingers. Check that they're cool and soft before serving.
How to serve it by age
6 months+
Offer fingers about the size of an adult finger, roughly 6–8 cm long and 2 cm wide (2½–3 × ¾ in). Squash one between your thumb and finger first: it should flatten easily and feel moist, with no dry, crumbly or chewy bits. If a batch is firm or dry, don't serve it as fingers: mash it with a little breast milk, formula or water until soft. For the next batch, bake it for less time.
9 months+
Break fingers into pieces no bigger than about 1 cm (just under ½ inch), or keep serving fingers.
12 months+
Serve fingers or bite-sized pieces about 1 cm (just under ½ inch) as part of breakfast, with a spoonful of plain yogurt for dipping once dairy is part of your child's diet.
Leftovers and the rest of the family
Storing it
Keep fingers in a covered container in the fridge for 3 to 4 days, or freeze them for 3 to 4 months (freeze them in a single layer, then pack them together once frozen). Thaw frozen fingers in the fridge if you like and use them within 24 hours of thawing, then reheat only once, until steaming hot, 165°F (74°C), and let them cool and check they're still soft before serving. Throw away anything left in your baby's bowl. Don't leave fingers at room temperature for more than 2 hours, or 1 hour if it's hotter than 90°F (32°C).

For the grown-ups
Cut bigger squares for older children and adults and top them with plain yogurt and soft fruit. For adults and children aged 4 and over, you can bake a separate tray with a pinch of cinnamon and some chopped nuts: the CDC lists whole or chopped nuts as a choking hazard for young children, so keep nut pieces out of younger children's portions.
Foods in this recipe



Free printable: The First 100 Foods checklist
Tick off foods as your baby tries them. Print it or save it as a PDF, no sign-up needed.